I’m hungry for a gyro……..but that would be 3 in a week……………

*YUM*

Thick slices of perfectly seasoned beef and lamb…….tomatoes……..Soft, squishy pita bread………and the melt-in-your-mouth, run-down-your-hands cucumber sauce. Don’t forget a crunchy dill pickle and if you’re me………..a large bottle of plum tea.
*Heaven*


And just so there’s no confusion on how to pronounce it:

Main Entry: Gy·ro
Pronunciation: ˈjī-(ˌ)rō
Function: noun
Inflected Form(s): plural Gyros
Etymology: Gyro International (association)
Date: 1971

I have a long list of things to buy. It’s so hard to wait and budget…………*sigh*

Since temporarily closing my Etsy shoppe, I’ve been busy working on new inventory. Here is a preview of what will be hitting my shoppe later on this month (hopefully).


Since I seem to be on a shoe kick lately (no pun intended), here is a new seller that I found on Etsy. What adorable, well-made shoes! They are handmade, using recycled car tires for the soles………very cool and green, too. I love the shapes, colors and fabrics. They look like high-end store-bought shoes!

See many more styles at the shoppe: extraseed


Here are some of my favorite autumn-ish shoes, all courtesy of Anthropologie. Enjoy!


Hello everyone and welcome to my first tutorial. The idea for this tutorial just popped into my head as I was thinking about my many friends who are new to crafting and blogging, etc., and I thought it would be fun to make a how-to. So if you like crafting, fabric, sewing, shabby chic, or all of the above…..I hope you’ll give it a try. And if you have any questions, please ask! Or comments or revisions…….since I’ve never done this before and I may have left something out. So please shoot me a message!

First you’ll need to print my pattern:Headband Template

Be sure to print with scaling set to “none” and paper setting on the “legal” size. Also, make sure you really do use the legal sized paper, otherwise part of your pattern will get cut off in the printing process. After your pattern has printed, cut out both pieces and trace the base onto card stock. Cut out the card stock pattern and discard the paper one. You should be left with one paper flower pattern and one card stock base pattern.

The materials that you’ll need: (plus a sewing machine if you have one)

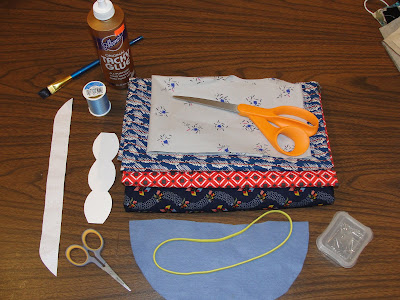
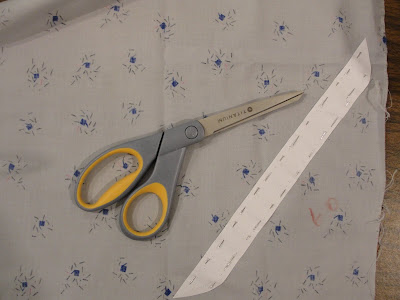
Step #1. Cut 9 flower pieces from various colored/printed cottons. Be sure to lay your pattern out on the bias, aka at an angle to the edges of your fabric. This will ensure that your flowers do not unravel too much, and will give them a much neater appearance.

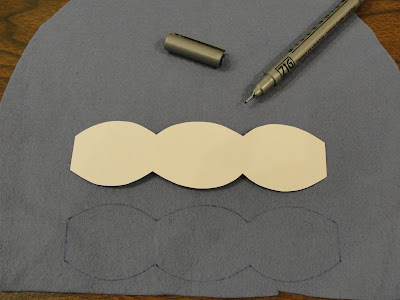
Step #2. Lay your base pattern on the felt and trace around it with an air-soluble marker. Mine ran out of juice, so I had to use a fine-tip permanent fabric marker. You can use whatever you want, as long as it leaves a fine line and won’t be too visible after cutting out. Trace once, and then flip the pattern over horizontally and trace again. The piece is not completely symmetrical, so this will ensure that you have two pieces that fit together correctly. Draw a line or write “wrong side” at the top edge of each piece, so that you can sandwich them together correctly during the last steps.

Note: Felt does not have a definite “right” or “wrong” side, so just go with your preference!

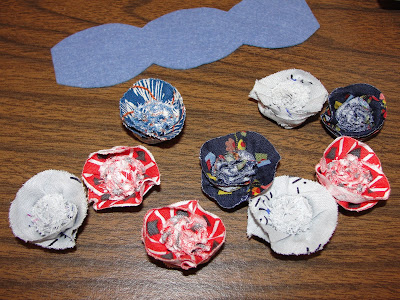
Here I have my base pieces and 4 flower pieces cut out.

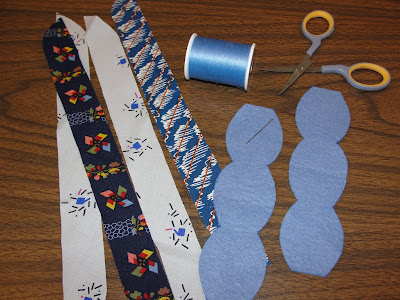
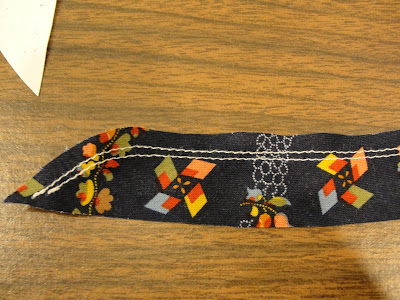
Step #3. Once your pieces are all cut, sew two gathering stitches along one long edge of each flower piece. Make sure it’s the end with the curves, and back stitch or knot the threads at one end. You can do the gathering stitch on a sewing machine, which is a lot faster, ( you don’t need a very loose stitch for these; I used a 2.5 on my brother machine, which is the normal stitch length ) or you can do it by hand.

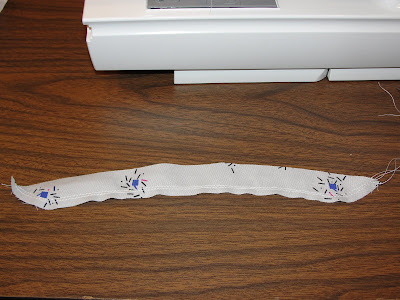
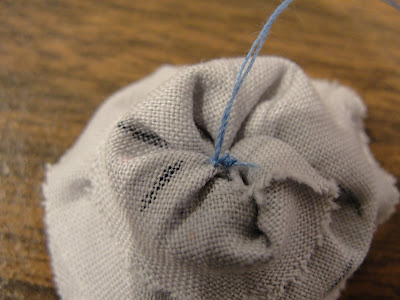
Here you can see the gathering stitches on one of my darker flower pieces. My first stitching line is about 1/8 – 1/4″ away from the edge.

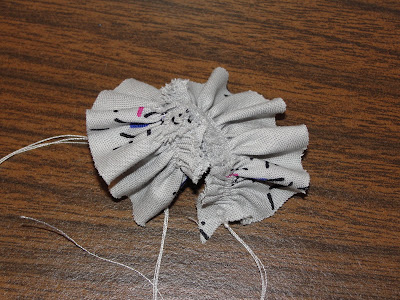
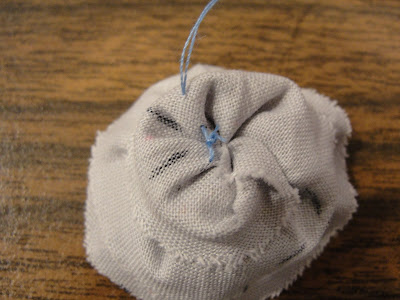
Now gather the flowers up snugly and knot the end. Trim threads, leaving a tiny tail.

Step #4. After your flower is gathered, thread your needle, knot the end, and pull it through the gathering at one end of the strip. Now begin rolling the strip in on itself, making sure that the right side of the fabric is facing out. After rolling the strip once, insert your needle directly above the uppermost gathering stitch…………

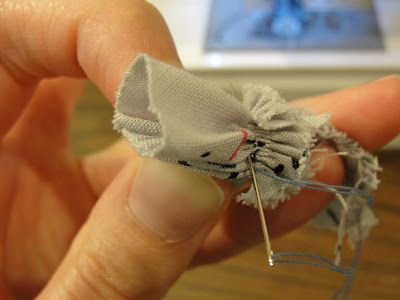
……………………pulling it through to the other side, coming out directly above the uppermost gathering stitch. Continue rolling and sewing through all layers in this way, until you reach the other end of the strip.

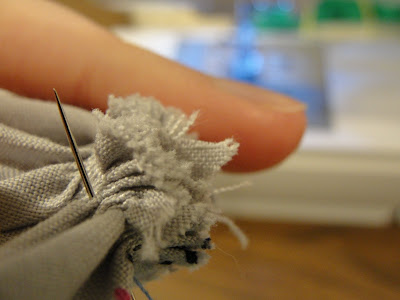
Once you’ve reached the end, wrap your thread around the base of the flower 2-3 times, insert your needle through the threads and pull out to the other side.

Knot and trim threads and any pieces of fabric that stick up higher than the rest.

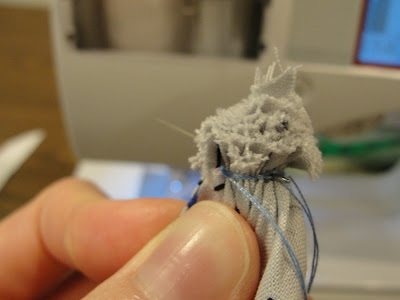
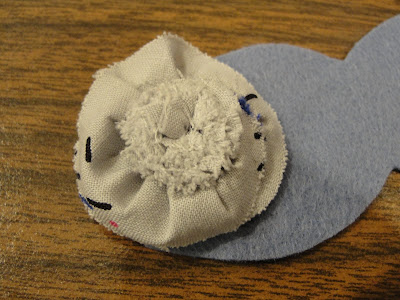
Step #5. Hold the flower so that the longer end is facing upwards, with your index fingers supporting the bottom, and your thumbs inserted inside of the flower. Now, spread your thumbs apart, turning the entire flower inside out and smoothing the shorter layers down over the longer ones. It should look like this.

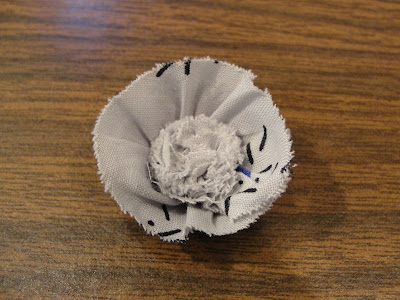
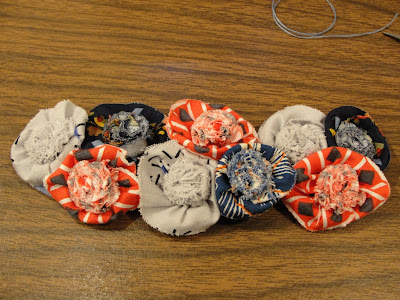
Turn over, and voila!

Step #6. After all of your flowers are finished, it’s time to attach them to the base. I like to sew mine, but you can use glue if you prefer. If you want to sew them like I did, the instructions are as follows:

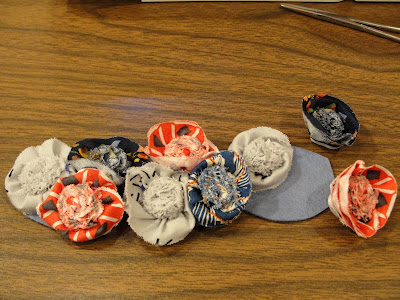
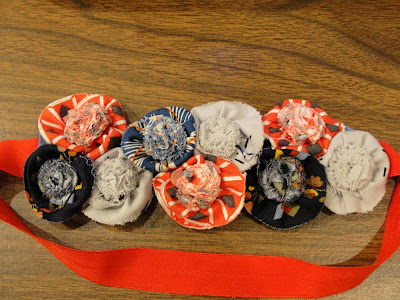
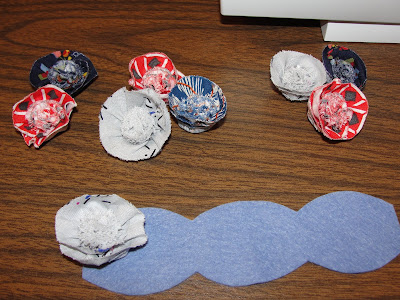
Arrange your flowers on the headband base in whatever order you’d like. I used three flowers on each of the 3 oval-shaped sections. And be sure that the markings on your headband base are facing DOWN, so that you are attaching the flowers to the unmarked side.

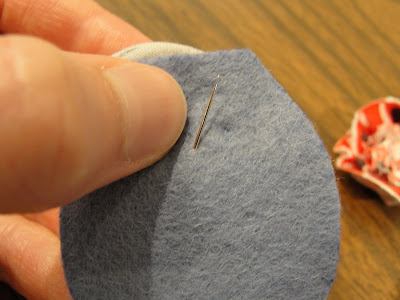
Take all of the flowers off, except for one, keeping them in the same general positions, so that you don’t forget where they go.

Thread your needle and knot the end. Now turn over your first flower and secure your thread as follows: slip your needle through the top layer, making a small stitch. Before pulling all the way through, slide your needle between the threads near your knot. Now pull snugly to secure.

It should look like this:

Make a small stitch out to the edge where you’d like to begin sewing.

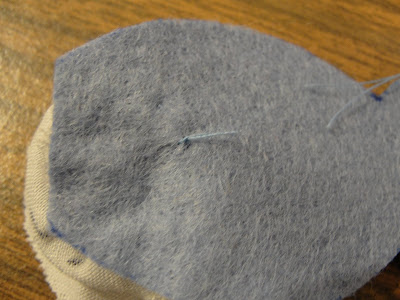
Position your flower on the base and hold securely with one hand while you sew with the other. Take a small, horizontal stitch through the top layer of felt, near the spot where your thread exits the flower, and pull through.

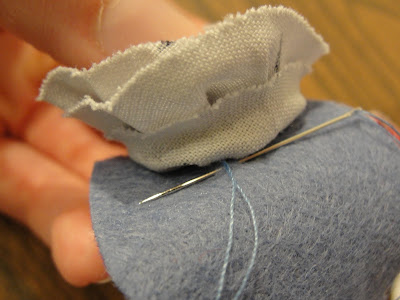
Now take a small stitch through the flower, starting at the point where the thread exits the felt.

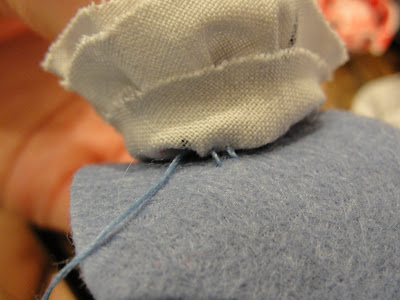
Take another stitch through the top layer of felt. Continue in this way until you have sewn all the way around your flower. Be sure you don’t pull the threads too tightly as you stitch, or else it will pull and warp your felt base. Just pull the threads snugly enough that the stitches don’t show.

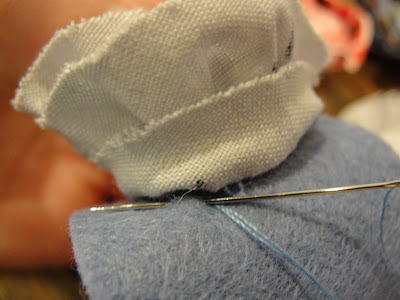
Once you’ve made it all the way around, insert your needle through the felt at the base of your flower……………..

………………..and through to the other side.

Knot the end and trim.

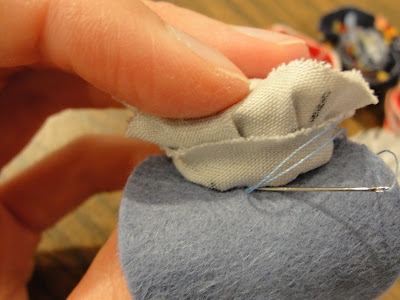
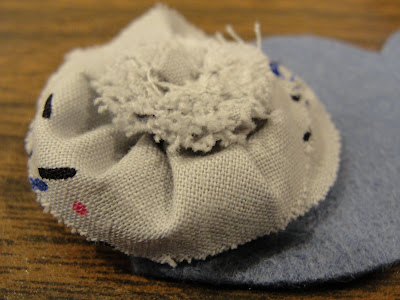
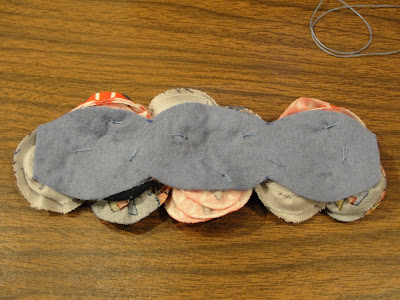
After your flower is secure, you can smooth the petals down toward the felt, to give it a nice, puffy shape.

Attach each flower in the same manner…………..

………..until they are all secure.


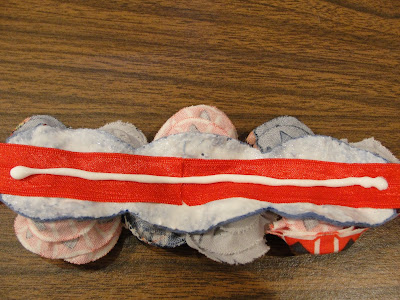
Step #7. Now it’s time to attach the headband. I was planning to use a skinny store-bought band, but it turns out that I only had one left and I didn’t like the color for this project.

So I used a piece of colored lingerie elastic instead, cutting it to the same length as the store-bought band.

Spread an even layer of tacky glue all over the back of the base, making sure that it reaches clear to the edge. Then lay your headband across the back, centering it, and spread another layer of glue over the band. (I spread the line of glue out with a paint brush before the next step)

Take your other base piece and place it over the top, making sure that the markings match up on both pieces and are facing to the INSIDE where they cannot be seen. Your first piece will be somewhat smaller because of the slight warping that occurs while sewing the flowers on, so you will have to do a bit of smoothing, scrunching and manipulating to get all of the edges to match up correctly.

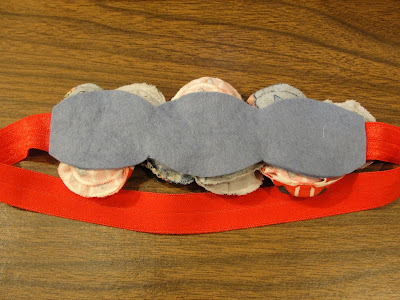
Tacky glue dries quickly, but I would suggest giving it about 12-24 hours before wearing, to be sure the headband will not come undone when it is stretched.

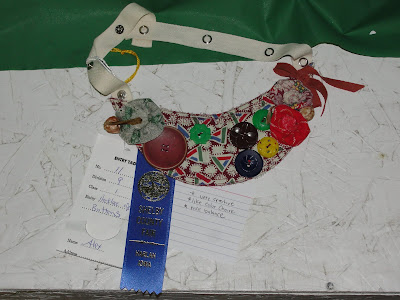
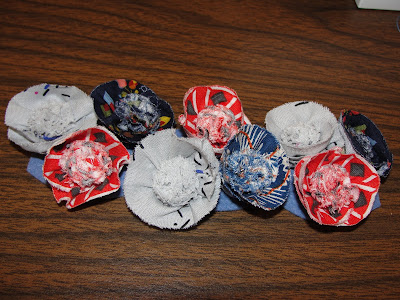
Ta-da! The finished product!!!!

I’ll try to post some photos of me wearing my headband soon………….and if you make one using my tutorial, I would love to post a photo of it here for everyone else to see!

Thanks a bunch for looking,
~Alexandrea

Dolman

–noun, plural -mans.
1. a woman’s mantle with capelike arm pieces instead of sleeves.
2. a long outer robe worn by Turks.

——————————————————————————–

Origin:
1575–85; syncopated var. of doliman, dolyman

***********************************************************
Excerpt:
Dolman sleeves, sometimes called batwing sleeves, are sleeves that are cut deep and wide at the shoulder, with armholes extending almost to the waist. The sleeves taper to the wrist, and when the arms are held outward the fabric hangs in a long wing. Unlike set-in sleeves, dolman sleeves are usually cut as one piece with the top of a dress, blouse, jacket, or coat. Full and roomy, the sweeping sleeve had been used for women’s clothing since around 1910 but reached a peak of popularity in the early 1940s. “

Read more: Dolman Sleeves – Fashion, Costume, and Culture: Clothing, Headwear, Body Decorations, and Footwear through the Ages

***************************************
These look like something out of the 80’s or 90’s to me, but it says they were actually popular in the 1940’s. Either way, I like them, especially with the cropped look and sweater material. The print is cute, too. 🙂

photo courtesy of delias.com

Here’s a drawing from a 1940’s sewing pattern with dolman sleeves. It seems that we’ve made them a bit more dramatic since then……

And…… Ah-Ha!!!!! When I was looking for the 40’s version of a dolman sleeve, I found THESE……turns out I was right when they reminded me of the 80’s. haha! These are both sewing patterns from that decade.


Yeah, the sleeves on these are a lot more dramatic than on the 40’s version.
And I’m glad to know that I’m not crazy. 😉 At leat not too crazy.
As promised, here are the rest of my fair photos! I just love the look and idea of old fair and circus stands, rides, etc. The lights, colors and vintage styling are so appealing! I just wish I’d have thought to take a couple of shots of some cotton candy or my funnel cake. 🙁 I guess I was too busy stuffing my face with it.

My favorite ride, and one of the only rides I’ll go on. How pathetic.

I had quite the tine with my camera, trying to get it to take good shots in the dark, with motion and little light bulbs everywhere. But I finally ended up with some shots I was happy with. And more of them turned out than I had first thought………….

And of course I had to capture some carousel shots. These were a lot easier, because there was a long period when no one was riding it.

Everything at the county fair is pretty old and beat-up, but I think that adds a bit of quaint, old-fashioned charm. 🙂

I normally don’t spend much time looking at the 4H animals, but we seemed to have more leisure time this year. It was fun getting some photos of them.

One of the sheep being sheared. I didn’t get to see it actually happening, though. The poor thing looked really scared with that bright light in its eyes.

How cute are these two? It’s like they were posing for me.

Someone had better feed this calf before he eats the baby! ;P

I love this pic. Look, it’s Wilbur!

This little boy let us pet his rabbit!

These flower pot scarecrows were set up all over the fairgrounds. What a cute idea!!

Last but not least, a few of the other projects I thought were worth showing. My sisters entered a few drawings and paintings. April’s is the one with the little girl making cookies {top right-hand corner} and Alayna entered the tiger, rose and the two paintings on canvas.

Someone’s painting of Rhianna. It looks just like her!


I saw this one the day I went to enter my projects, and thought, “I’ll bet that painting wins.” Sure enough! How amazing………..

I am in love with Re-Ment! In case you’re not familiar with this wonderful collecting phenomenon, Re-Ment is a Japanese brand of realistic-looking miniatures; about the right size for Barbie dolls (1/6 scale). My mom and I were fortunate enough to be allowed to sell the American sets on our website, and for anyone interested, we still have a few available! {www.kindercottagekeepsakes.com} In Japan, Re-Ment are sold in individual sets, sight unseen. You know from the box which collection the set is from, but not the particular set that you will get. They are cheap, therefore kids buy, sell and collect them like baseball cards here in the US.

Most Re-Ment, like the few below, are only available in Asia, so you’ll have to buy them off of ebay, Etsy, or from individual collectors on the web. Following are just a couple of my current favorites.

Align Center

Little Twin Stars……….these are popular characters in Japan, similar to Hello Kitty. I think these sets would be adorable displayed with my Riley Kish dolls.

This set must be fairly new, as I’ve never seen it before today! I think it’s called Toy Story Happy Birthday, or something to that effect. There is a lot more to it, but the photos aren’t very good, and I could only find a few on ebay, so they must be rare. You can better pics on the official Re-Ment website HERE. I would love to have an entire collection of these for my DJ Kish!

Yummy looking sandwiches! I bought a set of these off of ebay for myself, but have yet to display them. Someday soon I will have to post some photos of my Re-Ment collection, half of which is displayed in the huge dollhouse collecting dust in my room. I really need to clean it out.

Merry Strawberry Set! How cute is that? Again, I’m thinking of my Kish dolls…….

The sets below are from the collection Cake Shop. I’ve never seen these before, either! Only one person is selling these on ebay {username: cknbb} if you want to look them up. Don’t they just make your mouth water? As my friend Sasha would say, “I need a bib”. Or maybe it’s just because I’m hungry…………


Well, I’m back from the fair! My mom entered most of my projects (open class)
on Wednesday while I was at work and I took the last few, that I wasn’t sure what to do with, after I got off. Anyway, the family and I went down to the fairgrounds after work yesterday and spent the whole evening scouring the open class sections, taking pics, walking around the midway and eating. I ate almost an entire funnel cake by myself! But it was sooooooo good. No regrets.

As for the projects I entered………I didn’t do too bad: 😉

Best of Show in the sewing department! My mom accidentally gave it away when I talked to her on the phone earlier in the day, but I still didn’t know which of my projects that they had chosen. I had my suspicions about this one, though. Today I found out that they were deciding between this one and the circus skirt that you saw in a previous post. I’m glad they were such a success!


Blue on everything! 😀

This necklace was made by sewing over tiny pieces of material that were arranged in a shape. I used metallic gold thread. Can you tell what it’s supposed to be? I had one nice lady tell me, “You can totally see it’s a unicorn!” I can’t see it, but…………….

My sister beat me out in the earrings department.

A blue and division winner for my lovely purse made with Constructivism’s pattern.

Wow! I was NOT expecting this! Best of show in the Hobby Craft department, too!!!

I entered this painted silk scarf last-minute…………an afterthought. Boy, am I glad I did!

I have more fair pics to share with you all, but those will have to wait for another day. It’s nearing 6 o’clock and I’ll be closing shop soon. So, until tomorrow………..
Ta-ta!